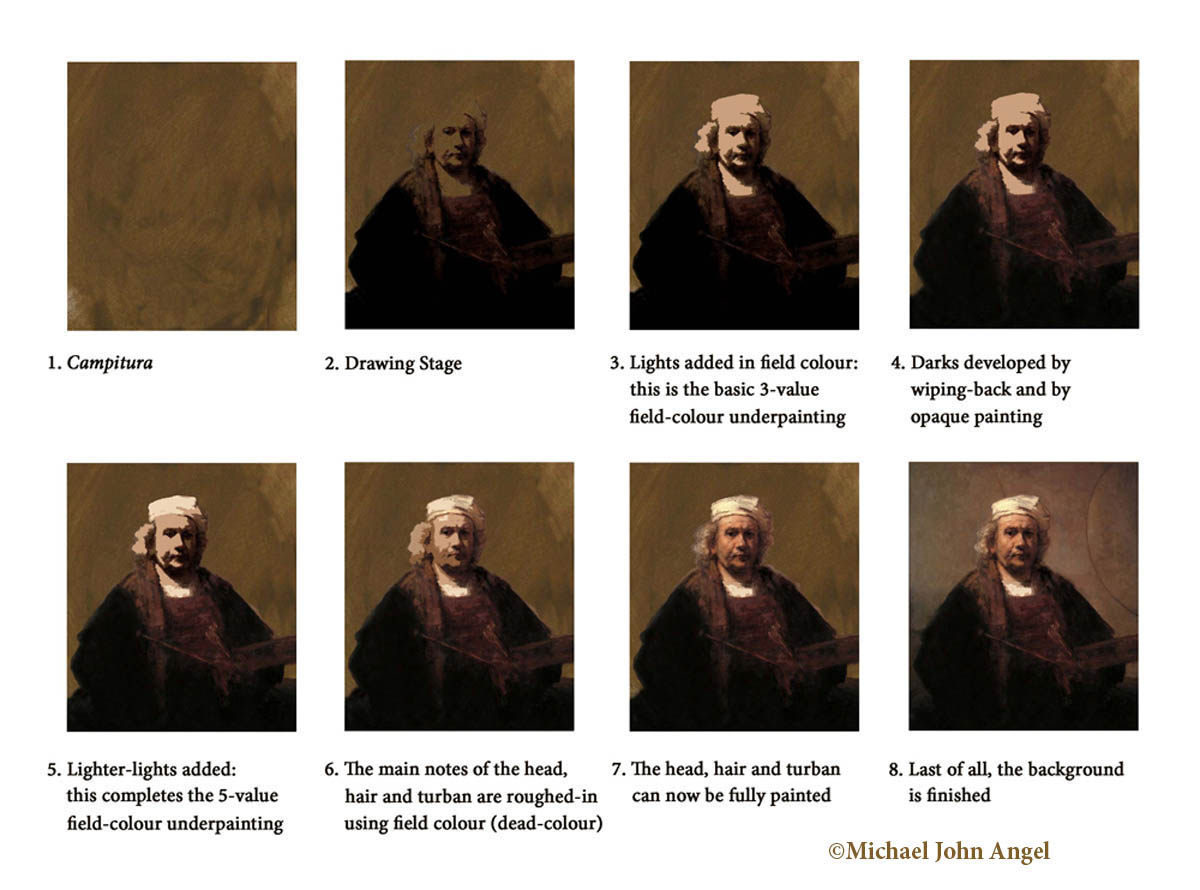
2. The darks are massed in, using a very dark grey-brown.
3. The lights are impastoed, using a light-value version of the field colour. This creates the basic three-value field-colour underpainting.
4. The darks are now elaborated by wiping-back and by opaque painting. Please note that steps 2 to 4 are done before the drawing stage dries.
5. Once the light shapes in stage 3 have dried thoroughly, the lighter lights are added, using thick paint.
6. When this is all thoroughly dry, the main value notes of the head, hair and white clothing are roughed in, using fairly thick paint; however, the paint is thinner in the transition tones and thin in the shadows. The colour of this roughing-in is the field colour (various values of greyed golden-brown), and the result is a monochrome underpainting, with strong, simplified form. This used to be called the dead-colouring.
7. When step 6 is thoroughly dry, the head and clothing can be painted in full detail using thin paint and full colour. Please note that the painter concentrates on the face and on the light draperies—the dark clothing is left as it was in step 4 (unless some tweaking is needed). A few extra thick highlights can be added here and there in the lights to strengthen the impastoes.
8. Last of all, the background is finished.


No comments:
Post a Comment